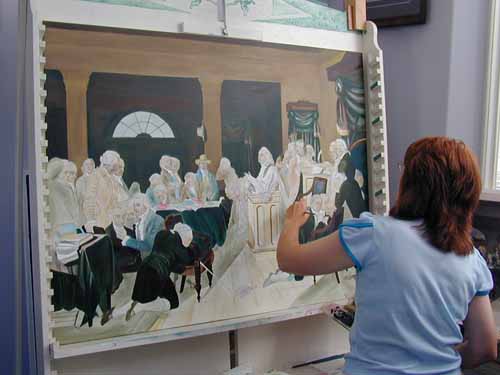
This was a commissioned piece which was documented for the benefit of the client, who resided many thousands of miles away, and wished to follow the progress unfold. This is an option which I offer in any major piece of work.
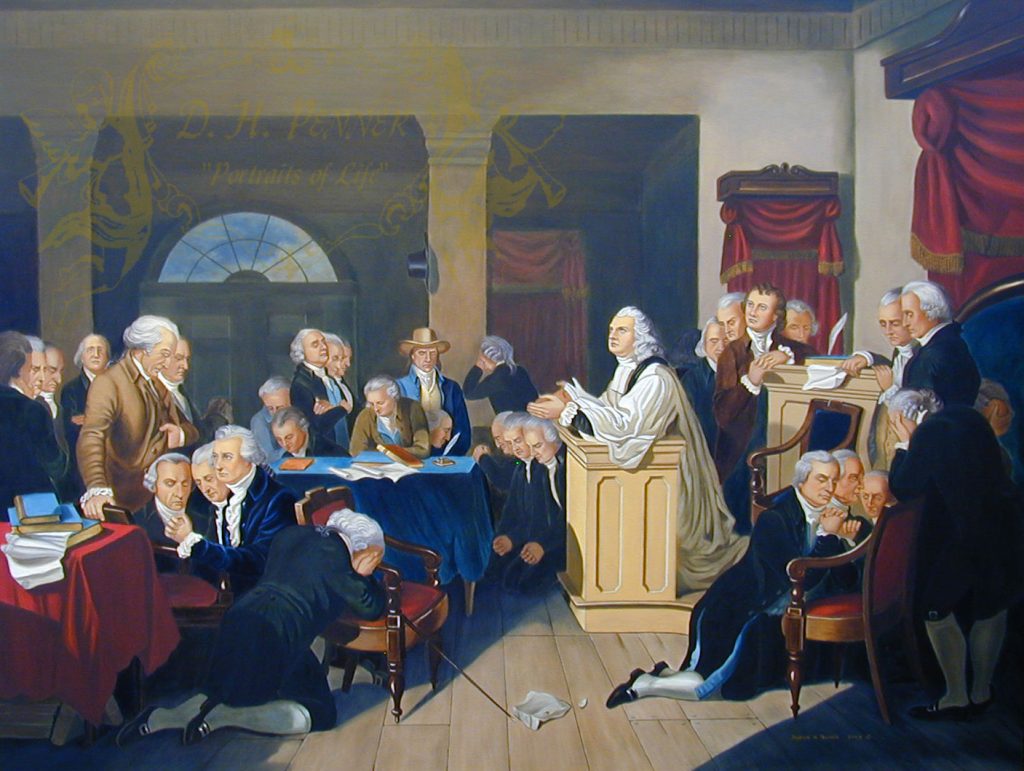
The original painting was done by T.H. Matteson in 1848 depicting the historical event of Sept 7, 1774 at Carpenters Hall, Philadelphia, Pennsylvania. Apparently the original painting was destroyed in a fire, with the only evidence of its existence being a black and white lithograph. There have since been several attempts to add color to this lithograph with varying degrees of success for a pleasing outcome.
My patron desired that a new painting be done in the full richness of colors and style, that T.H.Matteson would have used. He supplied me with the best version of black and white lithograph he could acquire along with a few other resource materials that could be useful regarding the picture as well as the artists style. From there I researched the subject matter and artist until I was satisfied that I had a good knowledge of what I was about to undertake, and the style, and color palette the artist preferred to use. (This is generally consistent throughout an artists career). I also resourced other painted pictures of some of the more prominent people to get a good grasp of what they looked like. The men in the painting are all known political figures of the time, such as George Washington, etc.
So here is the process I use… …The Making of a Painting…
THE DRAWING MAKES OR BREAKS A PICTURE
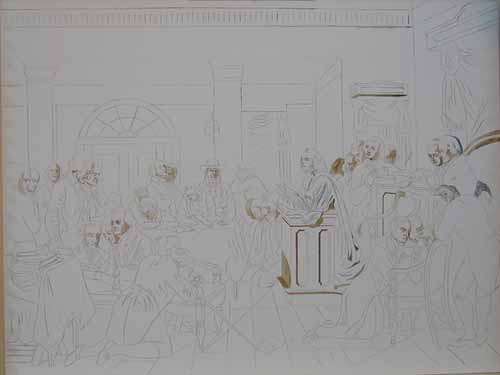
1) I always draw out my picture on paper first and work out all the details. This really is the most crucial part of the picture. If there is a flaw in this initial accuracy you will not end up with the professional picture you desire. This cannot be over emphasized. THE DRAWING MAKES OR BREAKS A PICTURE! This IS the most important step in a realistic painting.
2) When I feel t it is perfectly accurate I will then transfer this to the canvas. I use transfer paper for this job. This is a lesson in patience and perseverance. In this particular piece of work the transfer would take a good length of time because of the detail. Once I’m securing the picture from any movement, the job must be completed without break. If my picture were to slip for even the minutest fraction then I would have to start over. It also helps to use a colored transfer pencil so you can keep track of which lines have already been covered. Needless to say by the end of the session your hand and arms are pretty much done for the day!
Securing the lines
3) Once the transfer is complete the next step for me is to make sure I won’t lose the lines when I start painting. If for any reason I need to remove any paint I want my original drawing underneath. So to secure the drawing I go over every line in an ochre or umber color using acrylic paint. Using the permanence of acrylic here will make sure that I NEVER lose the lines even if I have to use turp to adjust some oils later. It also dries very quickly so you can continue with the picture.
Underpainting wash
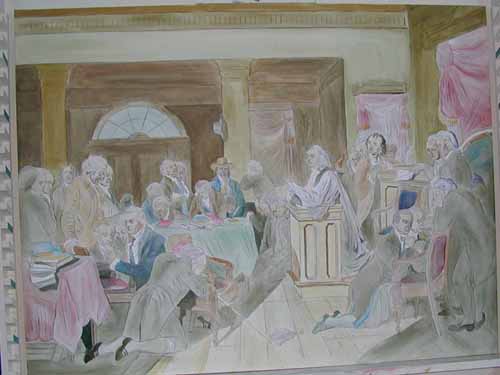
4) The next step is to do the under painting . This is a “wash ”which will set a “tone” for the overall picture) and block in my chosen color palette. This is done with thinned down oil paints.
Adding deepest values
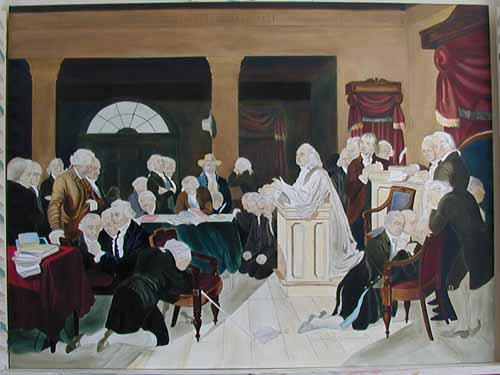
5) Next I start adding the deepest values. These would be the darkest aspects of the picture (including clothing, furnishings, etc.)
Progressing with Shadows
6) I can now start with the richer color palette I’ve chosen for the objects in the picture and start to define more form. As the color to this picture will be totally up to me as no one really knows what the true colors were in the original picture, I will be working out some of the details of this as I go along, always keeping in mind other paintings done by the original artist.
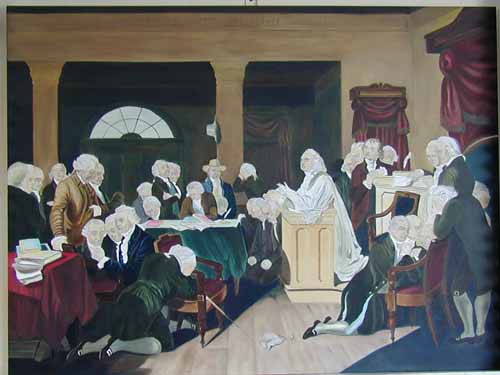
Floor and shadows on the floor
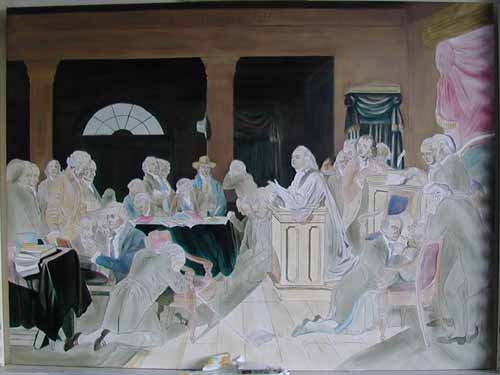
7) I’ve now started to work on the floor and Shadows on the floor, working my way down to the bottom of the canvas. More color is added to podium, fringe of curtains and more definition to stockings and shoes. Type within this text.
8) In this picture the wall got some attention, I’ve adjusted the color of the far table but most importantly is the painting of the faces. This is very detailed and time consuming for me, and I will spend a lot of time with this area, getting it “just” the way I want “them” to look! There are 36 figures in the picture with 29 needing facial features! I have also spent time here defining Reverend Jacob Duche’s robe
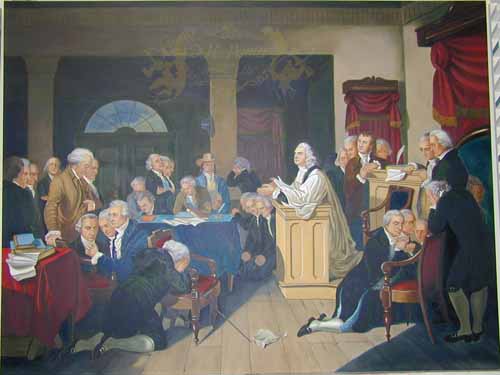
9) I will keep working on faces, adjusting colors and adding highlights until I feel satisfied.The highlights to the curtains and tablecloth are now in which changes the overall look and the shadow of the inner wall has been added. Details to clothing has also been done.I worked on this picture for approximately two months and had many gruelling eight hour days. This is a long time to hold a small paint brush in your hand to do detailed work. But it’s this kind of detailed work that I love. It defines who I am.
“First Prayer In Congress”
It was my pleasure to be asked to bring alive once more, in painting, this historical event. The finished painting is in private collection in Texas. Beautiful prints were made and I’m fortunate to have one as a reminder of the work that I love to do and the satisfaction that it brings me.
* Just thought I’d mention, my musical companion for the two months it took me to paint this picture was Rod Stewart’s “The Great American Song Book” ~
You’ll never have too much!
Having good resource material is always the first step, for me, before I take the plunge into my next major project. I believe this is probably true for most artists that work in Realism.
I will peruse magazines of all descriptions, use the internet and or go to the local library to collect all I can on my subject matter.
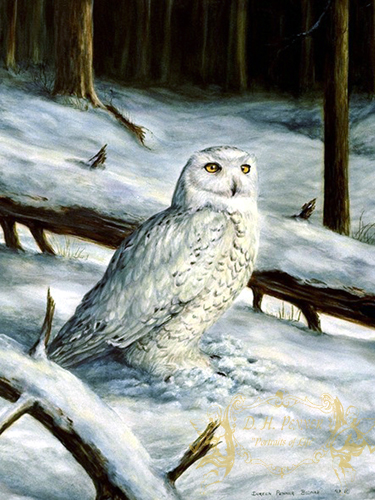
For instance when I did this picture “portrait” of the Snowy Owl, I collected dozens of picture from different angles to make sure that I thoroughly “knew” my subject matter.
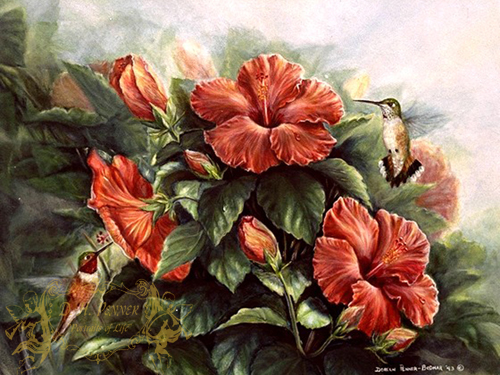
The same can be said for the many “portraits” that I have done of hummingbirds. It can’t be overemphasized how important it is to really “know” everything about the subject. Nothing dismays and annoys me more than when I see that someone has portrayed a male hummingbird with a female’s tail or vice versa!! For me “realistic” paintings are documented records, and it’s important to get the details “right”!
Another way that I collect resource material is documenting during travels. Taking a sketch book works well, if you’re out in nature and if you have the time to sit and sketch the details that you desire. This however, is not always possible, and many times not desirable, or extensively detailed enough for many projects. I must admit that for me it is not the ideal way to collect the pertinent and detailed information I need to complete my projects.
When it comes to good material to work from, I find that a camera is really my best friend. All you need is a half decent digital camera, and a few basic skills for using it. I always use high resolution so that if I choose to use the picture in the future, I can blow it up in size so the details are easily seen.
I have collected thousands of pictures in my travels that will give me enough resource material to probably last me to the end of my lifetime, and I am still constantly adding to my “stock”!
…”The King of all Art Instruments”…
Ahhh……the pencil……This is where everything starts for me. It is the instrument that initiated my creative process and projects well over a half century ago…and is still my most prized “worker”. It is this one lowly simple piece of graphite that I could not live without! It will start off every creative project as it transcribes my thoughts and imaginings into a visual reality.
From the lonely HB of my youth, which on its own could accomplish much, I now possess a full range from the hard “H” to the softest 9 “B”s. These little work horses greatly enhance the creative experience.
Of course there are now even more choices then there were years ago. Now this lowly little piece of graphite with a wooden coat has acquired a multitude of “relatives” that have shown up for the party, each with their own unique “personalities” and specialized functionality.
Some are rather distant relatives that may “look” like their simpler HB relative, but are in fact a “distant relative” and are really only a “pencil” in name, as they hide within their centre a much more flamboyant and exotic nature. It is my job to get to know these relatives intimately and coax them into a mutually beneficial partnership in which we can both get credit for the work done.
So…now the new relatives to the lonely HB include:
H all the way up to 9H (hardest)
B all the way to 9 B (softest)
tinted graphite Pencils – to allow you to add a hint of color (water soluble)
Ink Pencils (water soluble)
Metallic Pencils (water soluble)
Pastel Pencils
Water color Pencils
Bendable Colored Pencils
Charcoal Pencils
Sepia Pencils
…. Well, I’ve probably missed some of the relatives … and they do keep multiplying … but … I’m bound to forget some that are not frequent visitors to my studio!…
… All the above have their unique functions and in the next blog we can explore this in more detail…